The first time I played with scissors, it did not end well. However, seeing that my last 5-6 stylists have all managed to mangle up my bangs anyway, I decided I didn't have anything to lose. End result was pretty fly if I do say so myself.
In this city, there are no hand-outs, and booking an appointment just for a bang trim (and getting charged an arm and leg) just makes me want to bang my head against the wall. To avoid the hassle of commuting and overpaying for a literally 2-minute trim, I decided to give it another go and share what I've learned from my second time around the block.


Step 2: Tie or clip back everything you don't want included in your bangs. Here, I've pulled back everything beyond the red line. I included some side pieces to make sure they blended well into the rest of my hair. If you're not sure where to start, put on a thin headband and pull back everything behind the headband.

Step 3: Tuck the two longer pieces at the sides behind your ears. Comb the remaining hair around your forehead and divide into two horizontal layers. Clip the bottom layer (in blue below) to the side. Create more layers if you have heavier or thicker hair.

Step 4: Grab a sharp pair of scissors. I used my sewing shears. Make sure the blades are sharp and in good condition. You'll want it to cut smoothly and not pinch any of your hair.
Pull the top layer aside at an angle opposite where you usually part your hair. For instance, I usually brush my bangs to the right, so I pulled my hair to the left. Cut the top layer at a 45 degree angle. I started around my nose, but you can go shorter based on how long you want your bangs to be. Do not cut any shorter than your eyes. (This was a bad mistake I made the first time around.) You don't have to cut in one smooth stroke. Use more than one snip if you need to.

Step 5: Comb both layers together and pull to the side opposite where you want your bangs. Make another 45 degree angle cut right beneath your first cut.

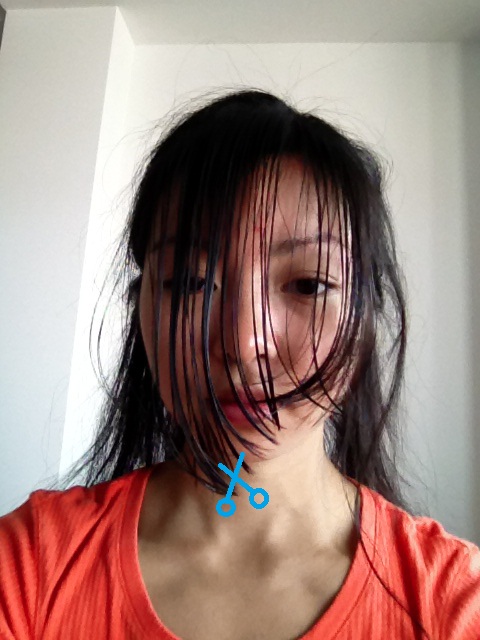
Step 6: Wet your hair down just a little so you can see where the ends fall. You can see the nice angle I've cut into the hair. If your bangs are still too long after making your initial cuts, just repeat steps 3-5 and re-cut your layers shorter and shorter until they are the length you want. If you're unsure how long/short you need to go to get the nice side-swept look, cut it at a longer length and slowly trim more.
Holding your scissors almost vertically to your hair, cut little triangles out of the bottom so that you have shorter and longer pieces. You don't want a blunt cut. The triangles will blend your hair smoothly together.
Step 7: When you're done, blow dry your hair with a round vented brush. Wrap your hair around the brush in the opposite direction you want your hair to curl. This seems counter intuitive, but it'll give your bangs lift and volume.

Step 8: Gently sweep your hair to the side and brush it into place. The volumized curls you put in with the dryer should help your direct your hair. Spray on extra-hold hairspray if needed. Voila!

No comments:
Post a Comment