I love cherry pie, but always have the tendency to overeat. One slice always leads to another. On the other hand, if I only take one, my gluttony compels me to simply cut a larger piece the size of a pizza slice, which is equally bad.
The perfect solution? Cupcake pies! (Or personal pan pies.) When you reach for more than one, your guilt trip tells you "you've eaten a whole pie" and keeps your taste buds in check.
I live in New York City and have a full time job, so am fairly busy and am sure a lot of other folks out there are as well. When I created this blog, I made a promise to myself to not post any recipes that took me more than an hour of combined prep and cook time. Being busy shouldn't limit the fantastic foods one can be eating, and I'm hoping by posting my ideas and experiences, I can help other folks live to eat and not eat to live.
Ingredients for 6 mini pies:
-12 oz of cherry pie filling (Make your own by purchasing sour cherries and marinating in a mixture of corn syrup, corn starch, and red food coloring. This obviously takes longer though.)
- 1/2 lime (or to taste)
-1 1/4 to 1 1/2 c flour (not the self-rising kind)
-1 stick unsalted butter
-optional tiny pinch salt (Yes, it seems counter-intuitive to use unsalted butter then add salt, but this way, you can control the salt content. I add less salt than what is in salted butter - just a tad to cut through the sweetness.)
-1/4 c ICE cold water (or melt a couple ice cubes in a shot of water)
-couple pinches of raw sugar (FYI - raw sugar is grainy and looks like brown sea salt for those of you who are looking for this but have never used it before) or couple pinches of powdered sugar
Step 1: Add the lime juice to your cherry filling. Set aside while you work on the crust.
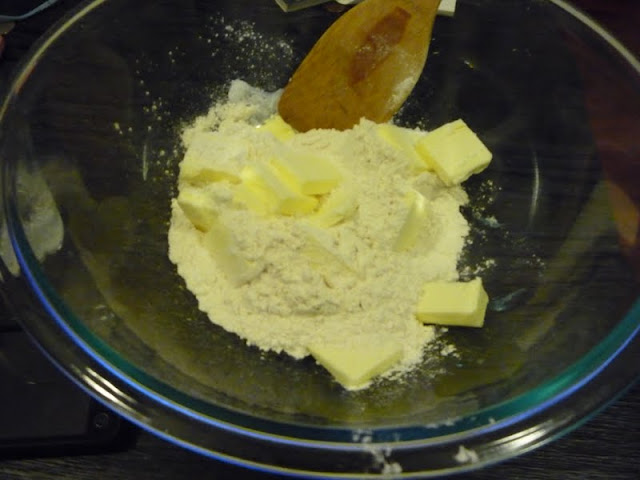
Step 2: In a large glass bowl, add the flour and salt. Cut in the butter in while it's still cold. If it's melted, stiffen your butter back up on the fridge. The key to getting the texture just right it so cold ingredients.
Use a wooden spatula to work the butter into the flour. If you don't have a wooden spatula, you can use some other firm utensil with a straight edge. This will help you cut up the butter and work it into a dough. Do NOT use an electric mixer. You will end up overworking the dough and it will not bake correctly.
Step 3: Add the ice cold water gradually a teaspoon at a time until you get what looks like pizza dough. You'll know you're done mixing when the butter has been completely crumbled into the flour and there no dry patches. It's ok if the butter is still a little chunky in spots. This makes the crust nice and flaky.
Step 4: Divide your dough into thirds. Two thirds will be used for the bottom crusts. The remaining third will be used for the lattice work on the top. Gently pinch 2/3 of your dough into 6 equally sized balls. Flatten out each ball and line your muffin tin with the crust. It doesn't have to be perfect. You can pinch excess dough off like clay and add to spots that are thin. The butter will meld everything together if you have some patchy areas.
Step 5: Once you have your tins lined, use a large spoon to fill each "cupcake" with cherry filling. Add as much or as little as you like.
Step 6: Roll out the remaining third of your dough and cut out small strips of crust with a knife. This will be used to form the lattice for the upper crust. Place two strips of crust across each muffin top. Cut out 2 additional strips and alternately weave them over and under the two strips you've placed across each muffin top. (Fun Fact: The wealthy are referred to as the "upper crust" because in medieval times when prices for flour soared, only the rich could afford to top their pies with an extra upper crust.)
Repeat until all your muffin tins are fulled with delectable little pies. Aren't they darling?
Step 7: Bake at 350 degrees for 35-40 min. You'll know they're done when the crust is a nice golden brown and the cherry filling is hot and bubbly.
Step 8: Wait for your pies to cool. They'll lift fairly easily out of the tin with the help of a fork. I've never buttered my tins, and the butter in the dough is usually enough to get it to easily pop out.
Enjoy! I like mine with fresh berries and whipped cream.
How did your petite pies turn out? Let me know!


No comments:
Post a Comment